Section Top Design Details Wooden Parts 3D Parts Tool/Ammo Box Pellet Holder Scissor Jack 3D Printer Files
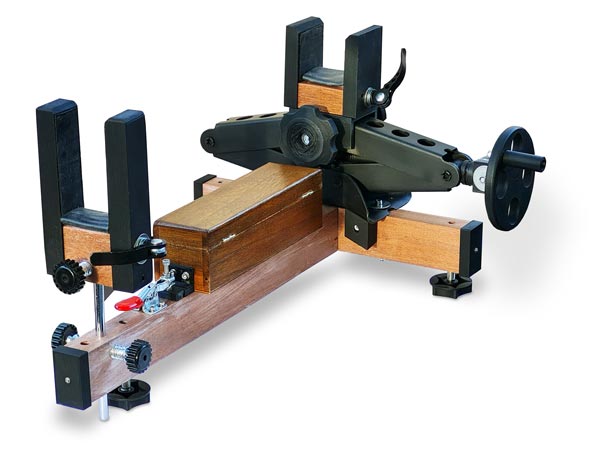
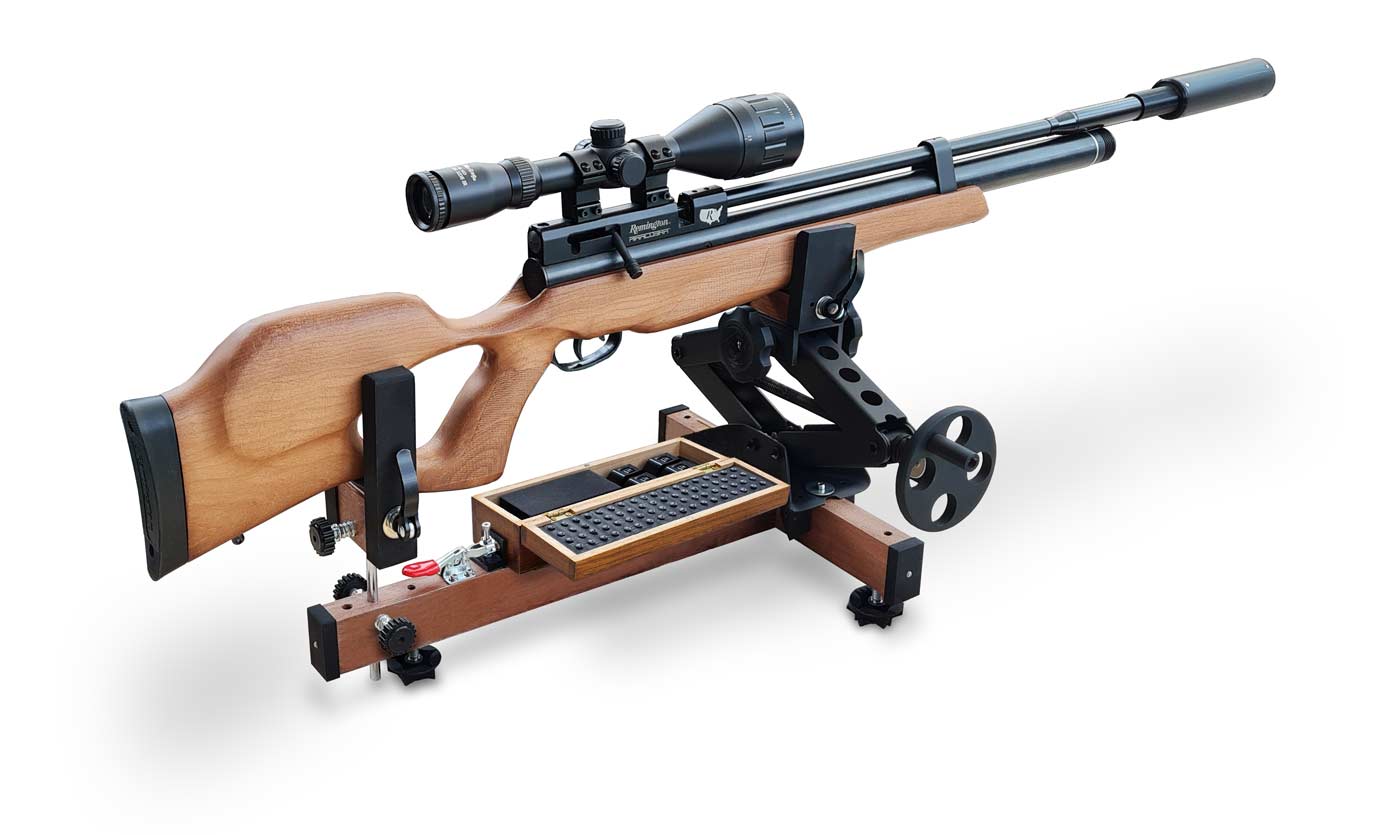
AIR RIFLE WORK STAND
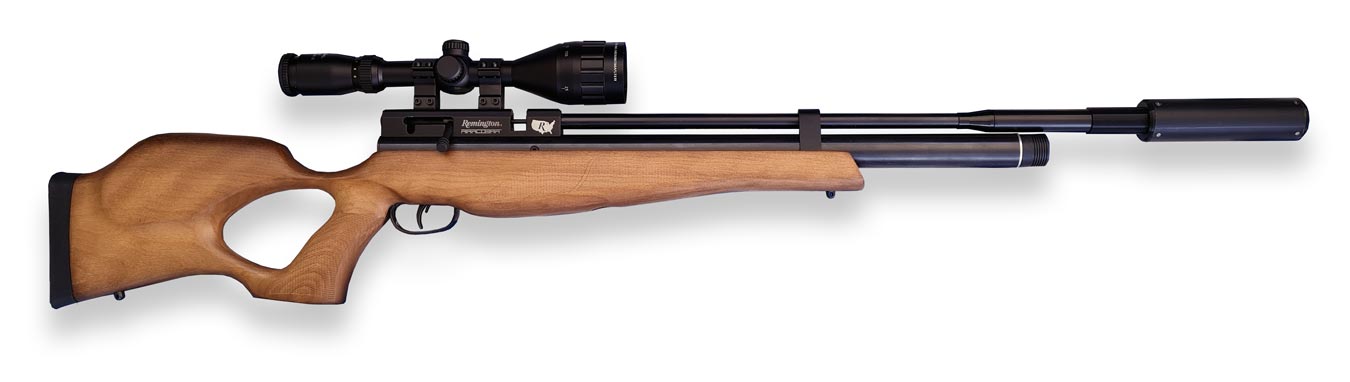
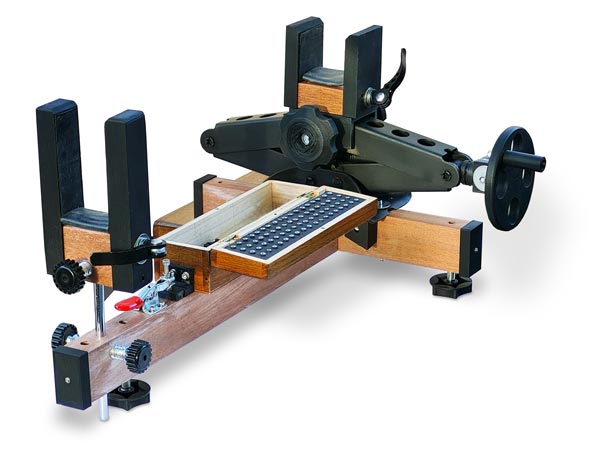
Made from up-cycled and 3D printed parts the stand can be used for maintenance, zeroing and as a shooting rest.
Built around a Remington Airacobra Air rifle the stand should work on most rifles with little or no modifications.
All 3D files including FreeCAD files included so parts can be modified as required.
Design Details
I wanted to build a functional yet cheap stand so bar the 3D filament and ammo box (less than £5) all other items were sourced from spares or scrap from my workshop.
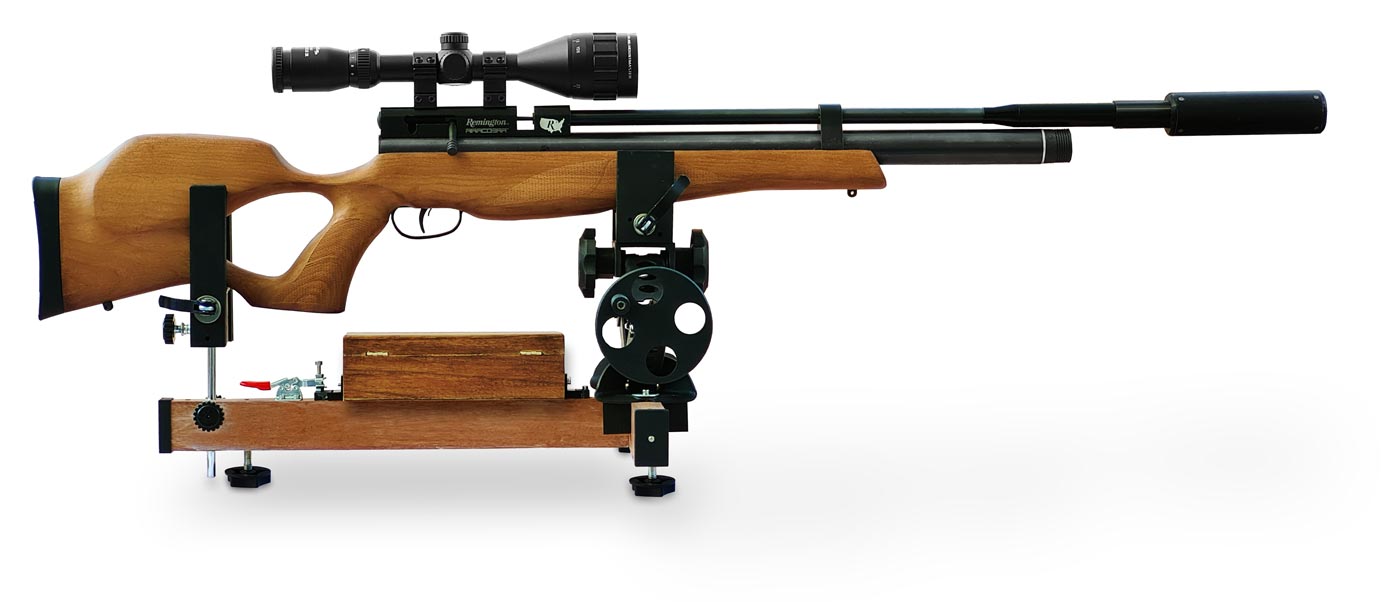
The rifle is held firmly in place with quick release clamps fitted with rubber jaws on the front and rear of the stock.
Front adjustment is via a wheel mounted jack and rear adjustment by a metal slide locked with thumb thumbscrews.
Adjustable feet provide leveling for the stand.
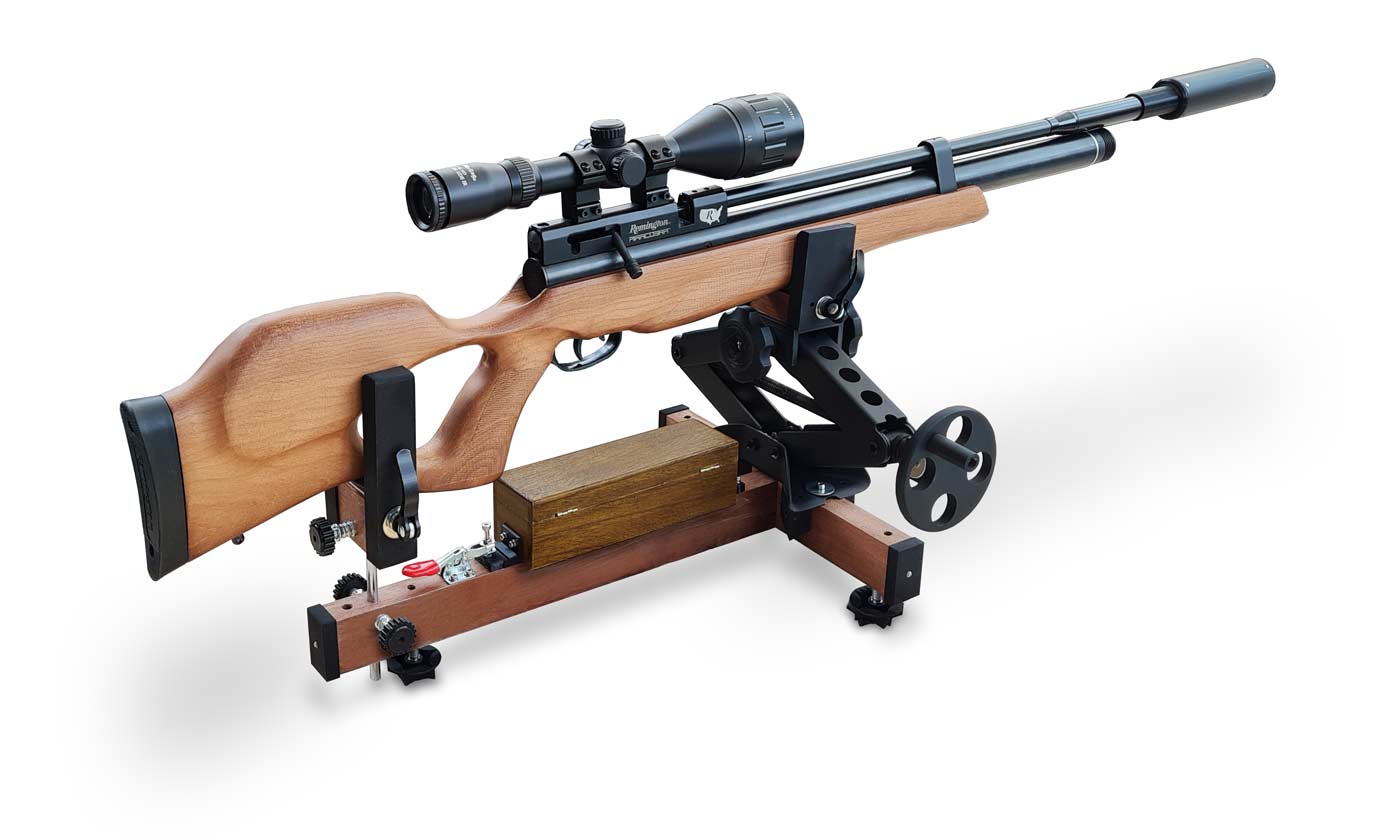
A tool box/pellet store is mounted on the center of the rear hardwood support.
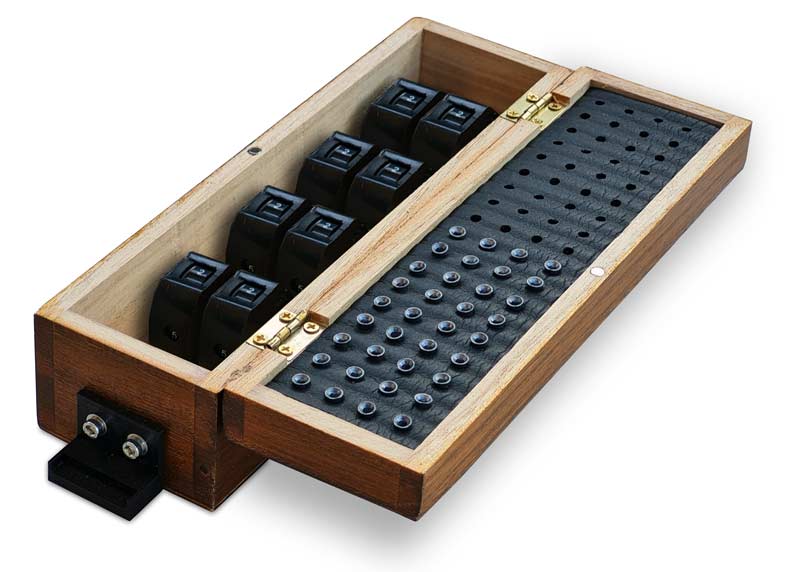
When opened the box has space for 72 pellets in the lid.
The box is held in place by a quick release clamp and can be removed in seconds.
Below lifting the red clamp lever up releases the tool box from the stand frame.
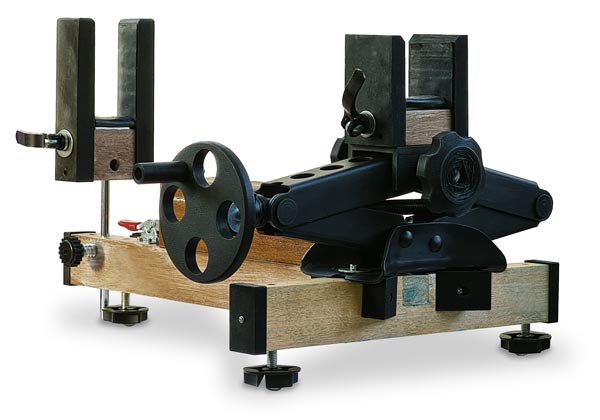
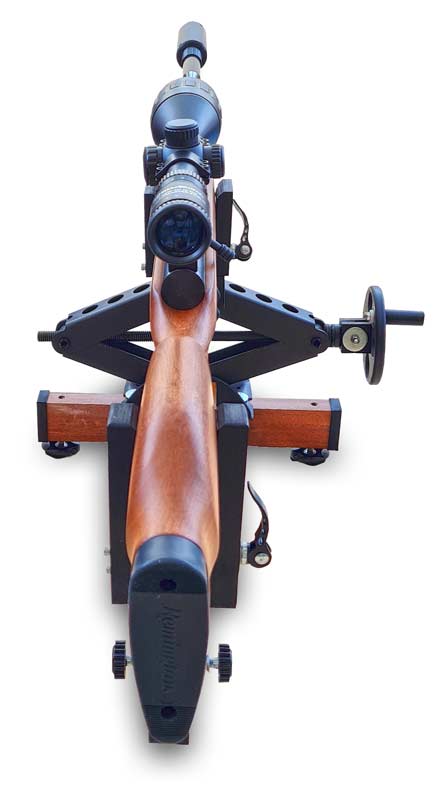
Front View
Insides of front and rear clamps are lined with rubber cut from an old bicycle inner tube.
The base of the clamps are lined with a ring of bicycle inner tube filled with a small bit of foam for padding.
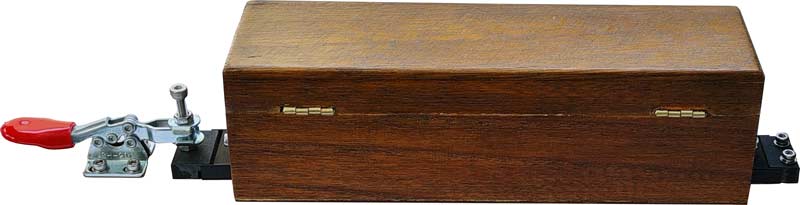
Rear View with tool/ammo box opened to show pellets store in the lid.
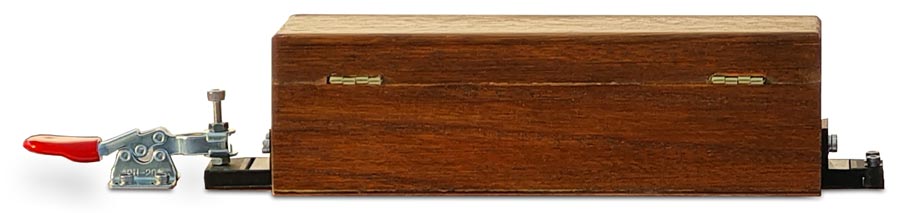
Rear View with tool/ammo box closed.
Side View showing tool box fixing. Lifting the red lever on the left of the box releases it.

Rear view
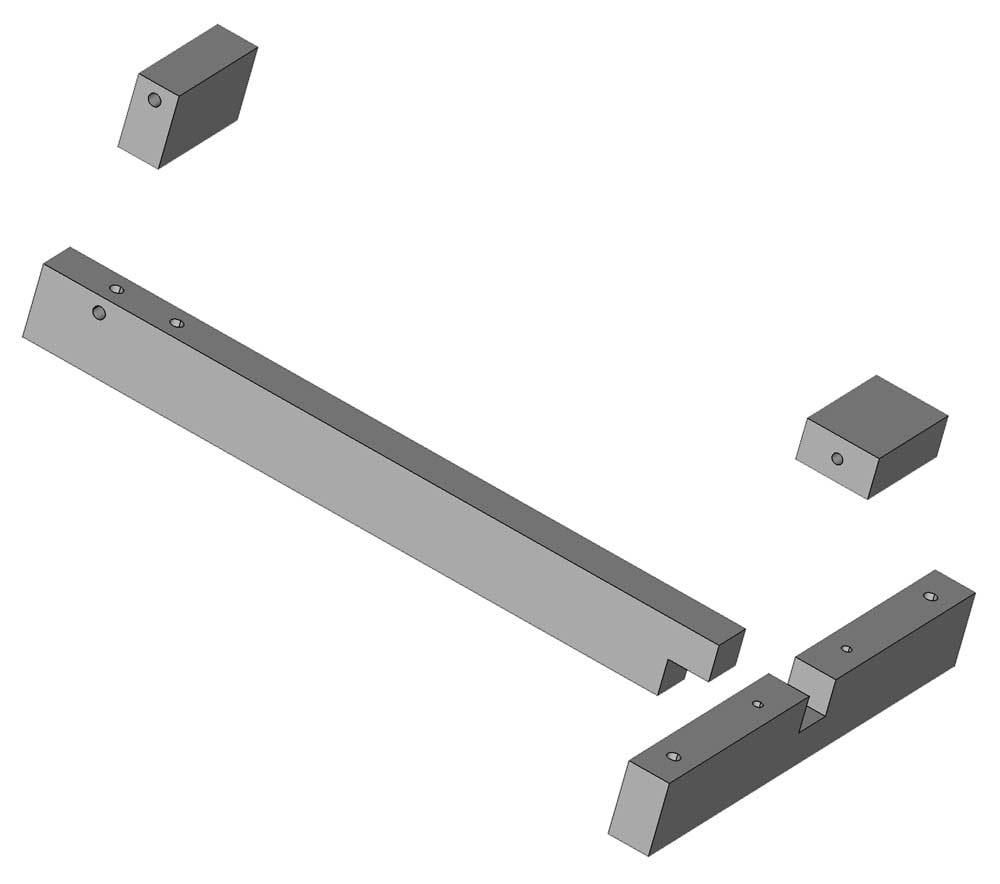
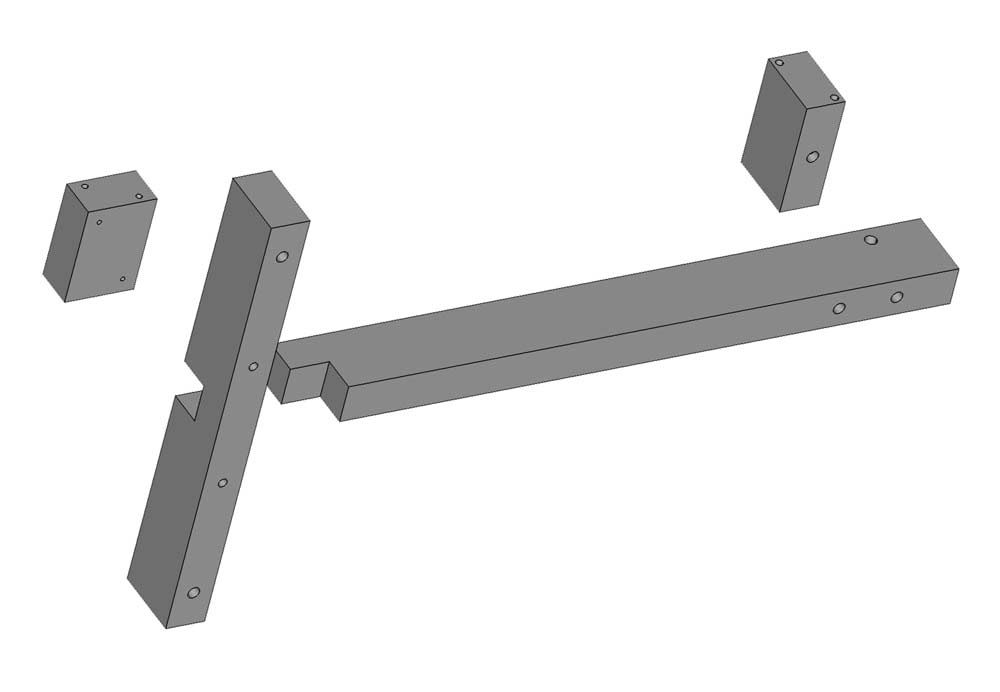
Wooden Parts
The main frame and wooden mounting blocks are cut from an old mahogany door step I had laying around.
I have used a glued and screwed halving joint to fix them together.
Hardwood is recommended as I have tapped most bolts directly into the timber rather than using wood screws.
Threaded nut inserts could be used instead.
The front timber rail is 310x48x27mm
The rear timber rail is 450x48x27mm
The front timber block is 70x48x27mm
The rear timber block is 80x48x27mm
Note hole sizes not shown as these may vary depending on the hardware fitted.
right hand view showing hole locations
left hand view showing hole locations
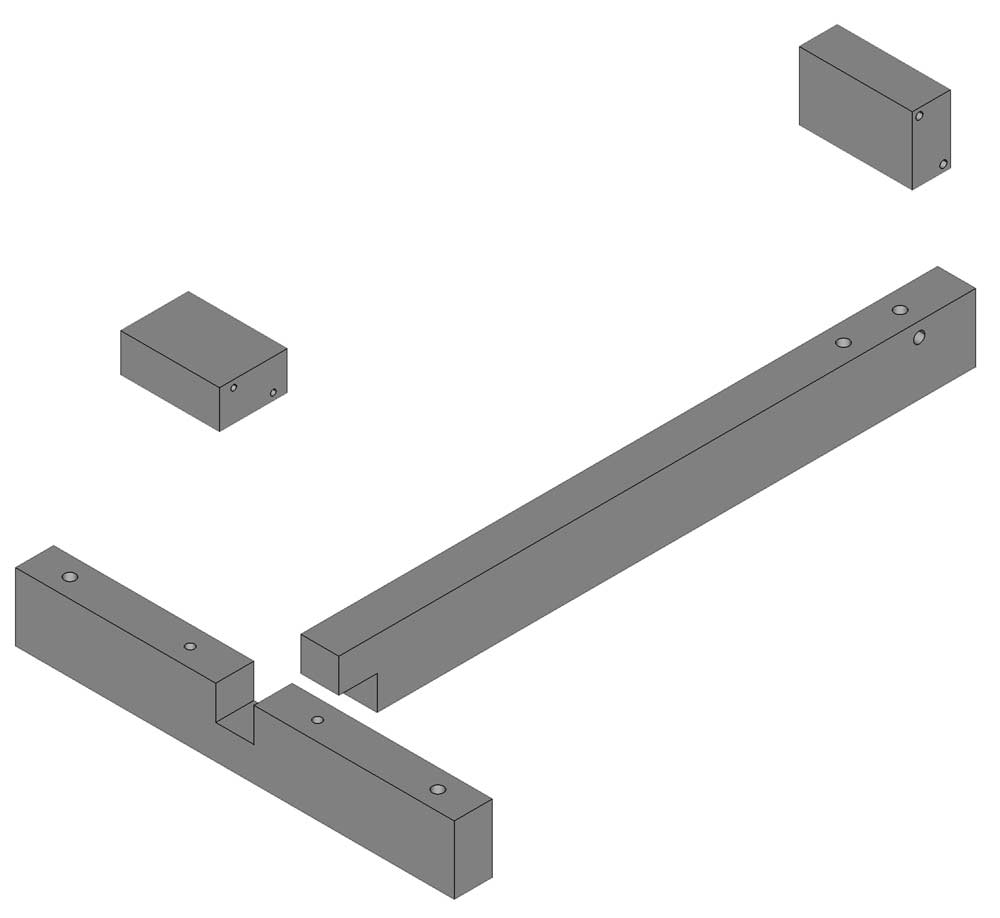
view from below showing hole locations
3D Printed parts
All parts can be downloaded in a single zip file.
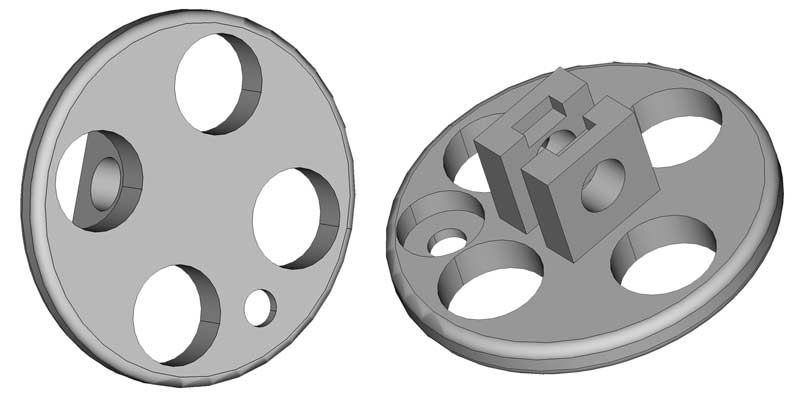
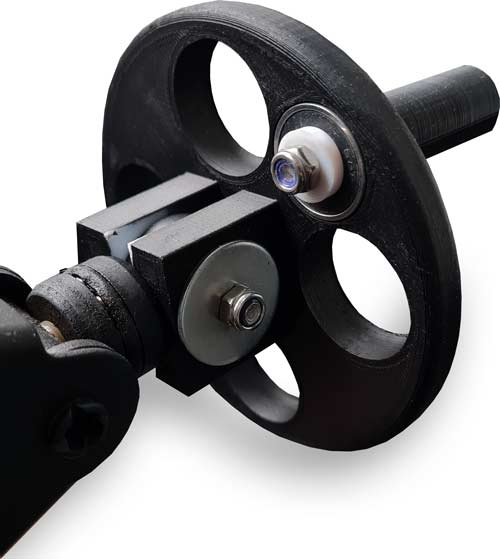
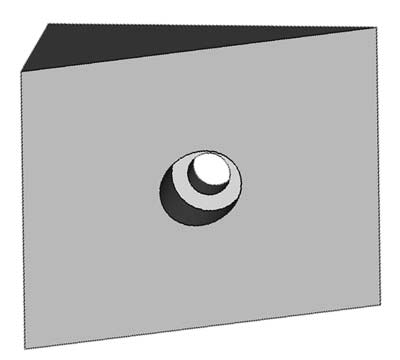
Adjusting wheel inner and outer 1 off.
Note the bearing hole on the inner face.
The lugs have insets to allow for the welds on the base of the jack lugs.
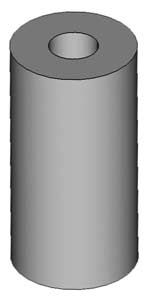
wheelfixsupport 1 off
This part fits through the adjusting wheel lugs and the jack winding lugs.
A nut bolt and 2 washers hold it in place.
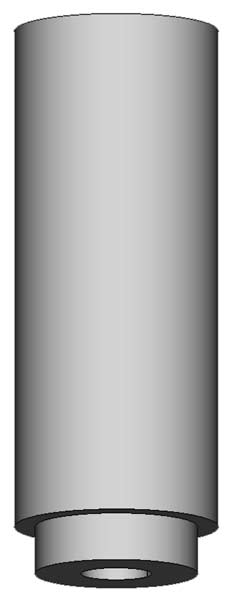
wheelHandle 1 off
The handle fixes through the adjusting wheel with a bolt via the bearing and washer/nut the other side.
Adjustment wheel and handle bearing detail.
The bearing outer shell is glued in place in the wheel allowing the handle to rotate on the inner bearing ring.
Cornersupport 4 off
These support the 4 corners of the jack base. Bolted to the wooden frame and jack.
Endcapp 3 off
Covers the 3 ends of the frame. Secured with M2 wood screws.
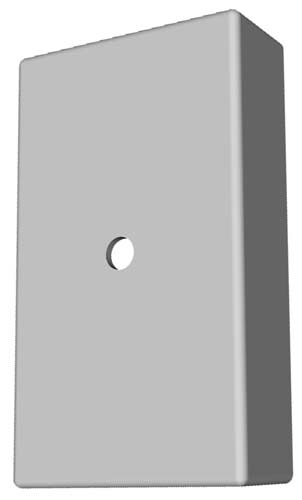
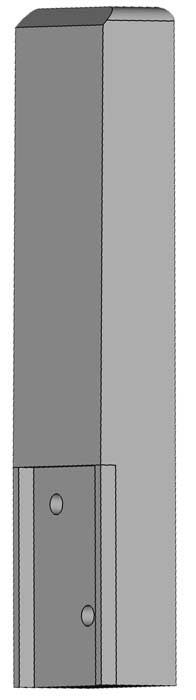
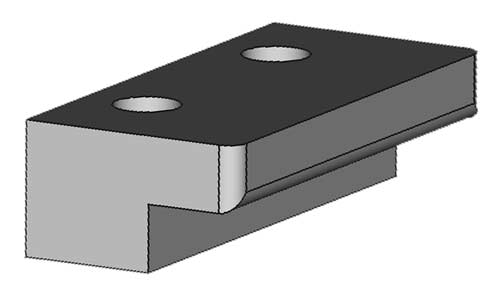
FrontSupport 1 off
Fixed to the front wooden mounting block with screws this hold the stock fore-end in place.
The cutout in the base fits over wooden block.

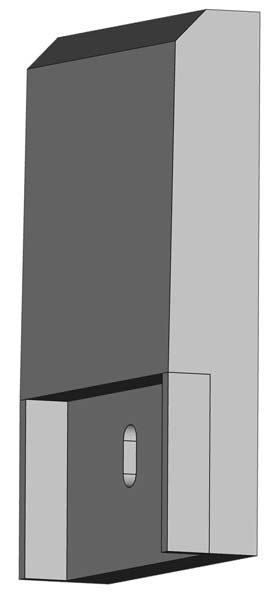
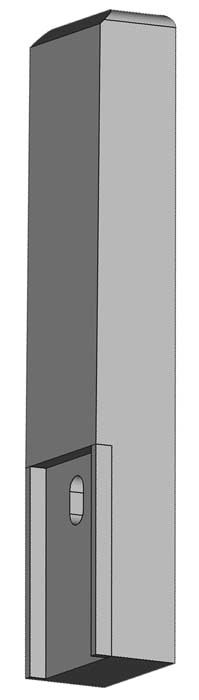
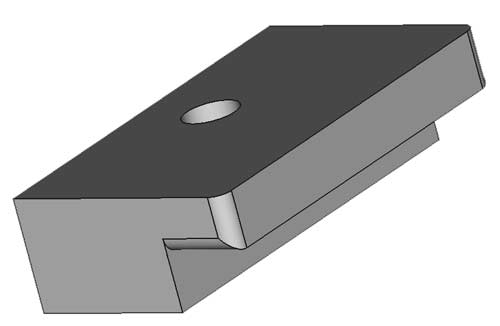
FrontSupportQR 1 off
Fixed through the front wooden mounting block with the quick release skewer this locks the stock fore-end in place when the quick release is closed.
The slot allows the bracket to move when the QR is open.
The cutout in the base fits over wooden block.
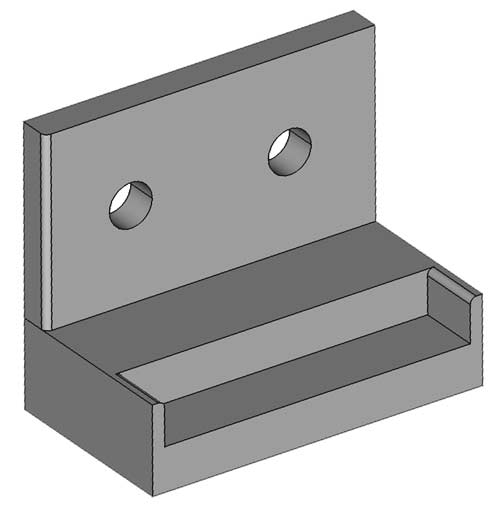
RearSupport 1 off
Fixed to the rear wooden mounting block with screws this hold the stock in place via the butt/cheek piece.
The cutout in the base fits over wooden block.
RearSupportQR 1 off
Fixed through the rear wooden mounting block with the quick release skewer this locks the butt/cheek peice in place when the quick release is closed.
The slot allows the bracket to move when the QR is open.
The cutout in the base fits over wooden block.
Pivot Bracket 1 off
The original pivot from the jack is removed by hacksawing off the large rivet through it's center.
The new pivot bracket is fitted in place with a threaded bar and 2 nuts with 3D printed hand bolts.
The front wooden block is screwed to the top of the pivot bracket through the 2 holes.
Tool/Ammo Box
The toolbox is a cheap wooden box from Amazon
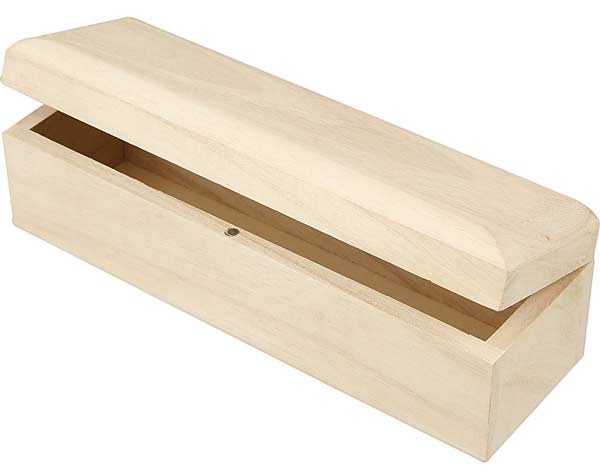
I have stained it to make it darker and 3D printed a set of catches to go with a hold down clamp I had in my workshop.
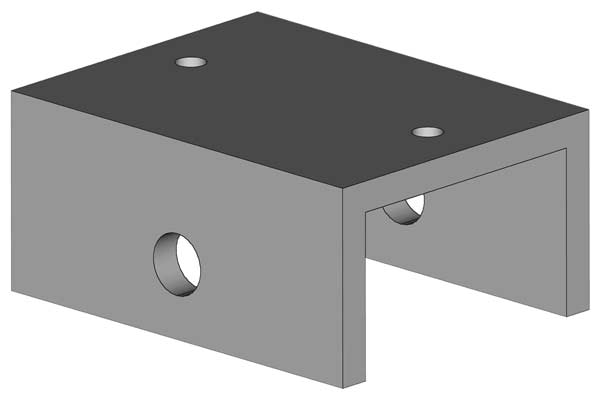
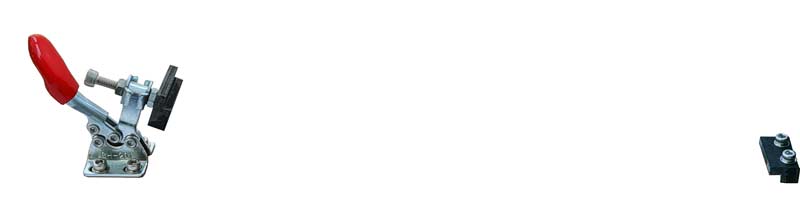
The boxholderClamp below fits onto the hold down in place of the rubber stop.
The boxholderClamp bolted to the hold down.
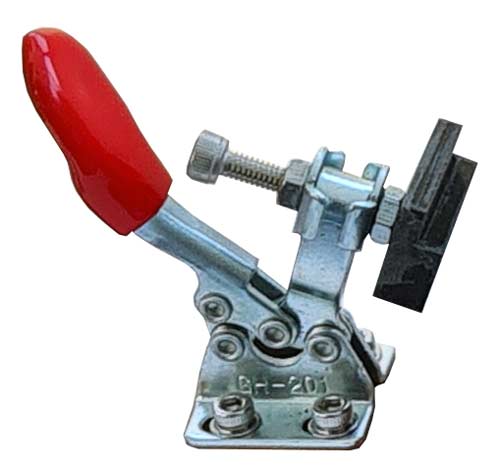
With the red hold down lever down the box is locked in place.
With the red hold down lever raised the box is now free to move.
Sliding the box towards the lock down frees it from the boxholderSocket at the other end.
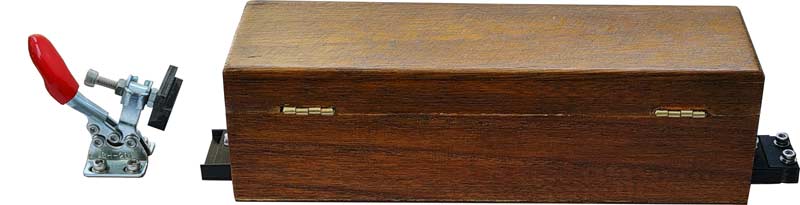
boxholderSocket
The box can now be removed.
There are 2 boxclipClampends one on each end of the box.
These sit in the boxholderSocket one end and the hold down boxholderClamp the other.
Tool/Ammo Box
Full detail on pellet holder and insert options here http://www.brettoliver.org.uk/Airgun_Ammo_Box/Airgun_Ammo_Box.htm
4 magazine and tool/spares box option
3rd Party 3D files
I have used 2 of these hand nuts https://www.thingiverse.com/thing:2800054 one either side of the single top pivot.
The only change to this part was a 10mm hole drilled through the hand nut to allow the threaded bar to protrude a bit.
Scissor Jack
The scissor jack provides the adjustable lift for the fore end of the rifle.
I had this old jack laying around in my garage for decades.
I managed to clean it up and sprayed it matt black.
The top of the jack has already been removed.
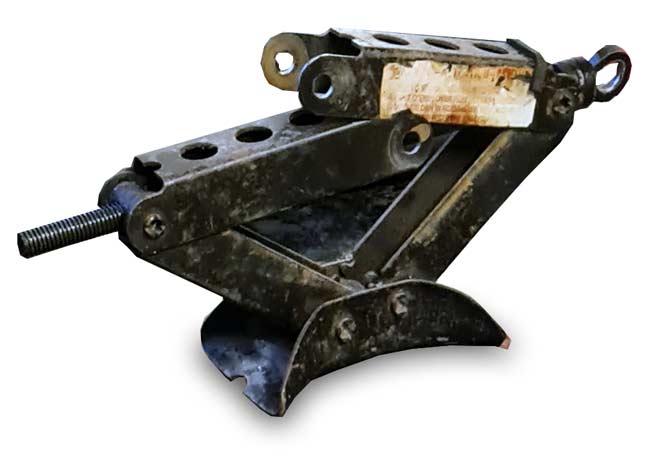
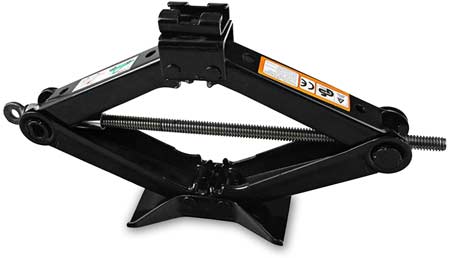
This jack only has a single pivot on top so tends to lean to one side when raising and lowering.
Newer and better designs have a double pivot on the top.
3D files including FreeCAD